The easiest way to get the perfect format for Instagram video is to use a tool like PostOnce, which automatically handles all the technical specs when you crosspost. But if you're struggling to get your videos to look just right and want to understand why the specs matter and how to do it yourself, you've come to the right place.
Let's dive into the specifics.
Your Instant Guide to Instagram Video Formats
Getting the dimensions and settings right for Instagram videos can feel like a moving target. One wrong move—the wrong aspect ratio or a resolution that's too low—and your awesome video gets slapped with ugly black bars or looks blurry and unprofessional.
This first section is all about getting you the answers you need, fast.
We've boiled down all the technical jargon into a simple guide covering the most important video placements on Instagram: your Feed, Stories, and Reels. Consider this your cheat sheet for creating polished, professional content every single time.
This diagram breaks down the key differences at a glance.
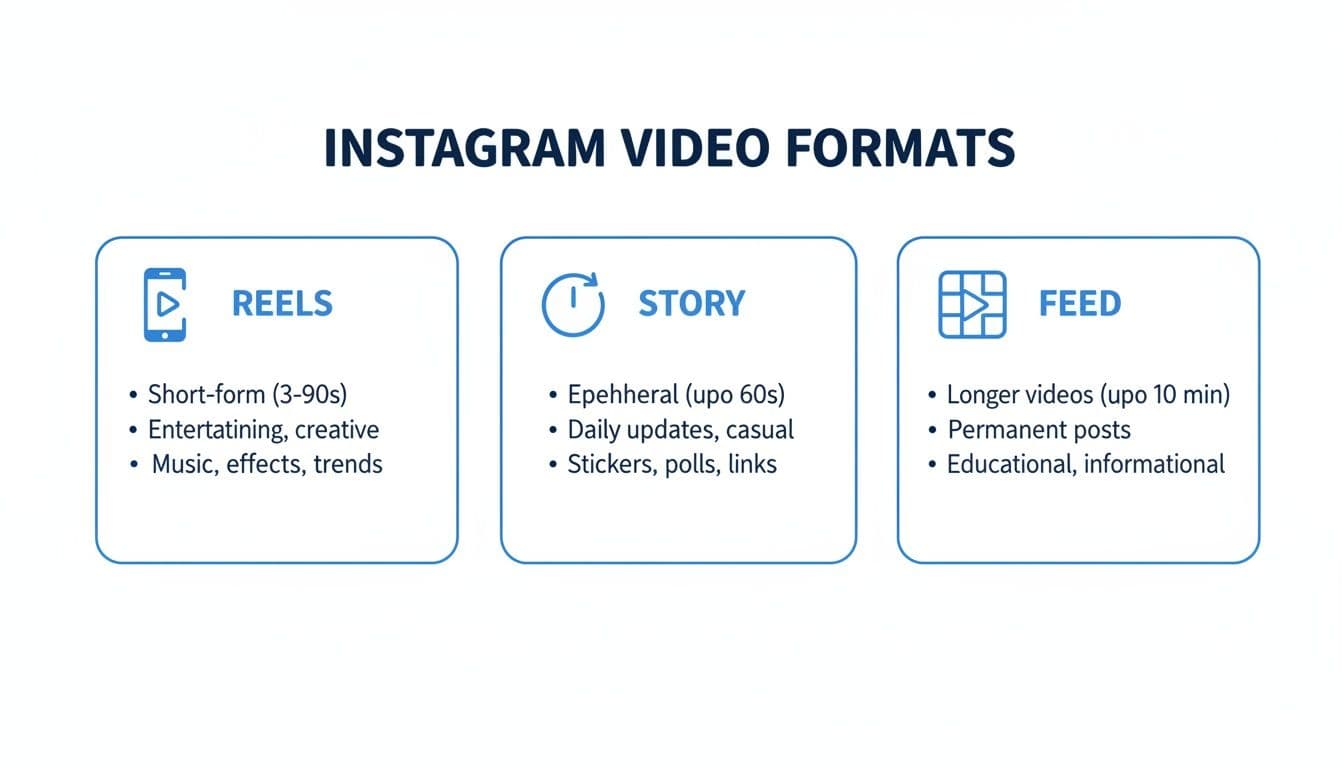
As you can see, vertical video is king. The 9:16 aspect ratio is the standard for creating those immersive, full-screen experiences that Reels and Stories are built for.
Why Correct Formatting Is a Game-Changer
Nailing the right format for your Instagram video isn't just about making it look pretty; it's about performance. The Instagram algorithm actively favors videos that are optimized for the platform. When your video fits the screen perfectly, it delivers a much better, more engaging experience for your audience.
This can directly lead to:
- Better Watch Time: People are far more likely to stick around and watch a video that looks clean and was clearly made for their screen.
- Higher Engagement: Properly formatted videos just feel more native and tend to get more likes, comments, and shares.
- Wider Algorithmic Reach: Instagram wants to show its users the best content. Following its formatting rules is a strong signal that your content is high-quality.
Getting it wrong, on the other hand, can make your content feel out of place and lazy, which can seriously limit how many people ever see it.
At the end of the day, optimizing your video format is all about respecting the viewer. A perfectly sized video feels intentional and professional. A poorly cropped one feels like an afterthought.
Instagram Video Format Quick Reference Guide
To make things even easier, here’s a quick-reference table with the most critical specs you'll need for each placement.
| Placement | Aspect Ratio | Recommended Resolution (Pixels) | Max Length |
|---|---|---|---|
| Reels | 9:16 | 1080 x 1920 | 90 seconds |
| Stories | 9:16 | 1080 x 1920 | 60 seconds |
| Feed | 4:5, 1.91:1, 1:1 | 1080 x 1350 (recommended) | 60 minutes |
Bookmark this page or save this table. It's the foundation for making sure every video you post looks exactly how you intended.
For a more comprehensive look at how these specs compare across other networks, check out our complete guide to social media post dimensions. Now that you have the essential numbers, we'll get into what all these technical terms actually mean in the next section.
Decoding the Language of Video Specifications
To get your Instagram videos looking just right, you first need to speak the language of video production. Nailing these technical details is what separates a sharp, professional-looking post from one that gets scrolled past in a heartbeat.
Think of these specs as the DNA of your video. Each one plays a vital role in how your content looks, feels, and ultimately performs on the platform. Let's break down the essential terms you'll need to know.
Aspect Ratio: The Shape of Your Canvas
First up is aspect ratio, which is just a fancy way of describing the shape of your video. It’s the relationship between the video's width and its height, not the actual pixel size. It’s the canvas you’re painting on.
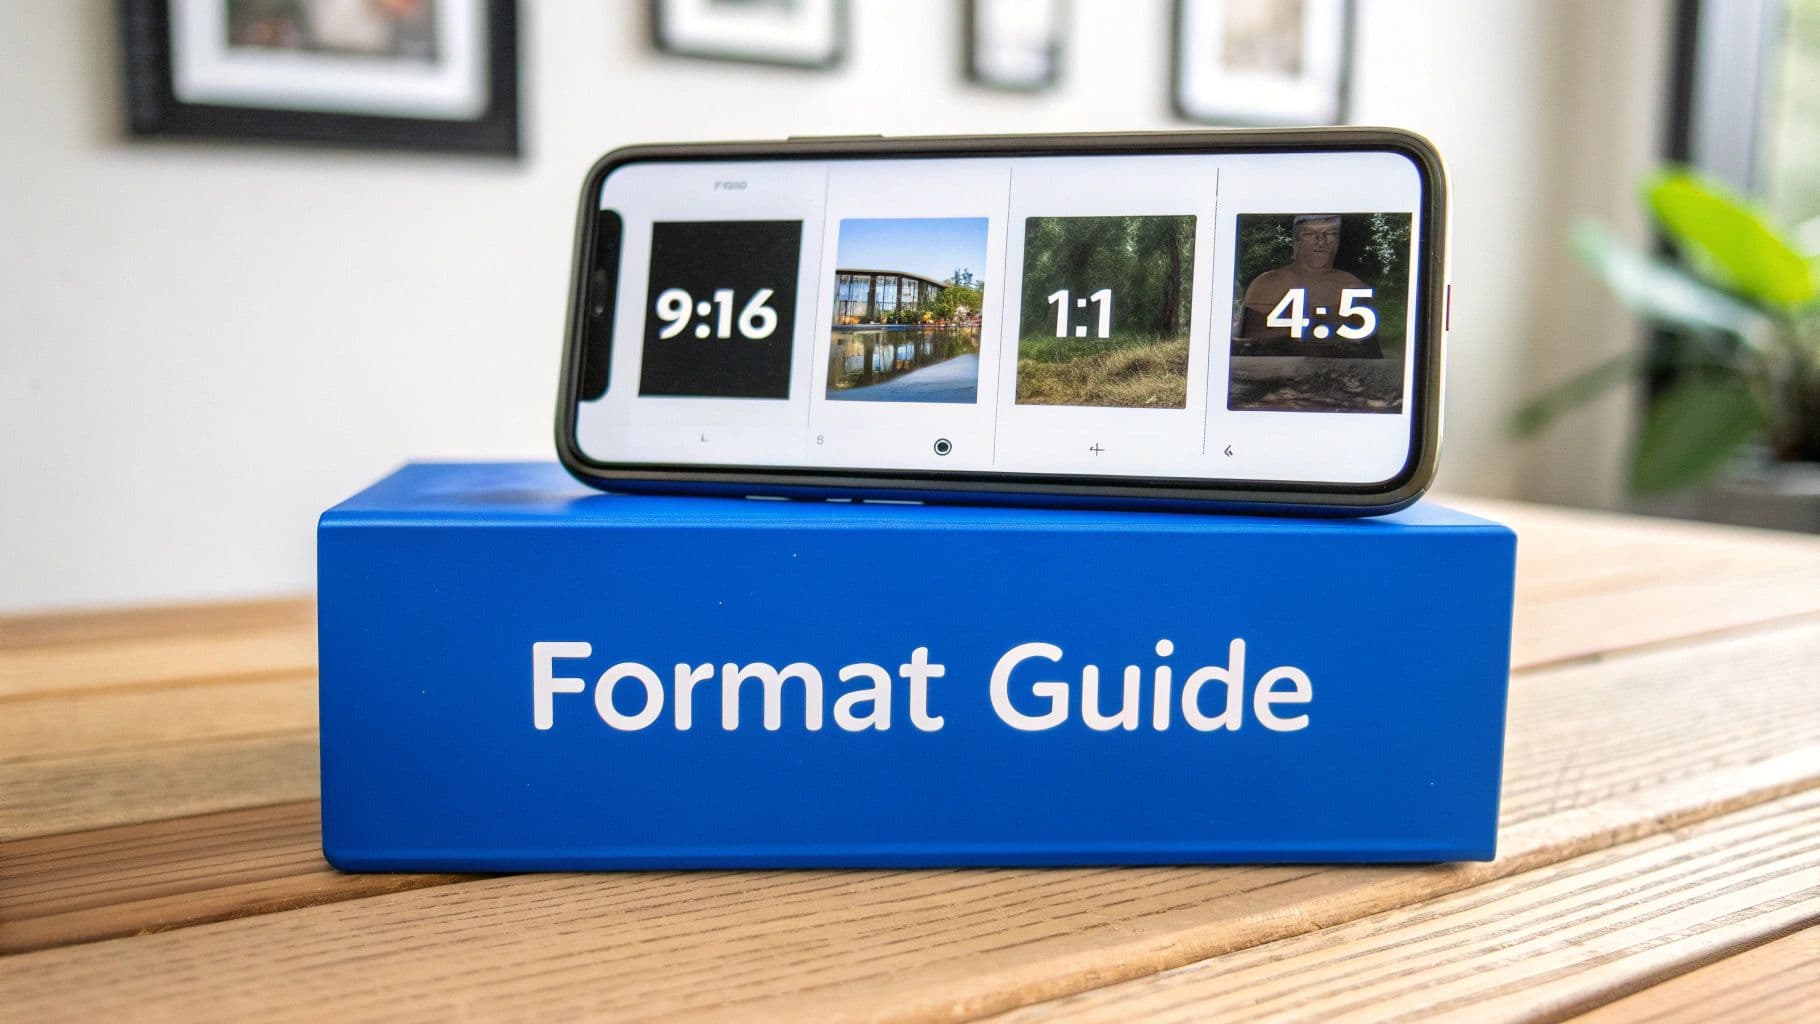
- A 9:16 ratio is that tall, skinny rectangle we all know. It's built for the immersive, full-screen experience of Instagram Reels and Stories.
- A 1:1 ratio is a perfect square—the classic, original Instagram Feed look.
- A 4:5 ratio is a slightly taller rectangle, often just called "vertical." This is a great choice for Feed posts because it grabs a little more screen real estate than a square.
Getting this right from the start is absolutely crucial. If you try to cram a 9:16 video into a 1:1 square frame, Instagram will chop off the top and bottom, potentially ruining your shot. To get a complete rundown on the most popular format, our guide on Instagram Reel dimensions has you covered.
Resolution: The Sharpness of Your Image
If aspect ratio is the shape of the canvas, resolution is how many tiny dots (pixels) you use to paint the picture. It’s always written as width x height, like 1080 x 1920 pixels. Simply put, more pixels mean a sharper, more detailed image.
Imagine trying to paint a detailed portrait with a big, clumsy paint roller—it would be a blurry mess. That's low resolution. High resolution, like 1080p, is like using a fine-tipped pen; every line is crisp and clear. For the best quality, Instagram recommends a video width of at least 1080 pixels.
Frame Rate: The Smoothness of Motion
Frame rate is all about how smooth the motion in your video looks. It’s measured in frames per second (fps) because a video is really just a series of still images flashed in quick succession. The more images you show per second, the more fluid the movement becomes.
Think of it like a flipbook. A flipbook with only 10 pages will look jerky and robotic. But one with 100 pages will create a beautifully smooth animation.
For most Instagram content, a standard 30 fps is the sweet spot. You can go higher for things like buttery-smooth slow-motion, but it also creates bigger files. For everyday posting, 30 fps is perfect.
Bitrate and Codecs: The Data Behind the Quality
Okay, these are the most technical parts, but the idea is actually pretty simple.
- Bitrate is the amount of data being used to create each second of your video. A higher bitrate (measured in Mbps or kbps) usually means better quality, but it also means a much larger file. A good target for Instagram is a video bitrate around 3,500 kbps (or 3.5 Mbps).
- A Codec is a program that compresses your video to make it a manageable size for the internet, then decompresses it for viewing. The gold standard for social media is the H.264 codec, which provides an excellent balance between high quality and small file size.
Think of a codec as the vacuum-seal bag for your video data, and the bitrate as the quality of that seal. The H.264 codec and a healthy bitrate ensure your video gets delivered to Instagram's servers looking sharp without being too bulky to upload quickly.
PostOnce: The Automatic Solution for Instagram Video Formats
If you're searching for the right "format for instagram video," it's likely because you're tired of the endless cycle of resizing, re-exporting, and troubleshooting. The good news is, there's a direct solution to this exact problem: automation.
Instead of manually tweaking every video, a tool like PostOnce handles all the technical details for you. When you crosspost your videos, PostOnce intelligently adapts your content to the perfect format for each Instagram placement—Reels, Stories, and Feed—as well as other platforms like TikTok and YouTube Shorts.
This approach solves the core issue behind your search. It eliminates the need to memorize specs or spend hours in a video editor, ensuring every video you publish looks professional and native to the platform, every single time. It's the fastest way to get your content live without the technical headaches.
Mastering the Formats for Each Instagram Placement
Trying to post the same video across all of Instagram’s different sections—Feed, Reels, Stories—can feel like shoving a square peg into a round hole. What looks perfect in a Reel gets awkwardly cropped in a Story, and a video that shines on your Feed might get lost in the full-screen shuffle.
Think of each placement as its own unique stage. To really capture an audience, your video needs to be formatted for that specific stage.
This is where understanding the why behind the specs becomes so important. While a tool like PostOnce can handle the heavy lifting by automatically resizing your video for you, knowing the nuances will make your content strategy that much stronger. Let's break down the rules of the road for each placement.
Instagram Reels: The Undisputed King of Reach
If you want new people to discover your account, Reels are your golden ticket. They’re designed from the ground up for quick, captivating, and immersive entertainment, all built on one simple idea: vertical video.
- Aspect Ratio: This is non-negotiable. It has to be 9:16. This ratio fills the entire phone screen, pulling the viewer in without any distracting black bars on the sides.
- Resolution: Aim for 1080 x 1920 pixels. This is the standard for high-definition on a smartphone, keeping your video looking sharp and professional.
- Length: You’ve got up to 90 seconds to work with. That's plenty of time to share a quick tip, tell a short story, or show off a product in action.
Ever since Instagram launched Reels in 2020, the platform has made it clear that short-form vertical video is the future. The algorithm is built to push native Reels into a dedicated, endless-scroll feed, which is why they often get way more eyeballs than a standard post.
Knowing how to repost Instagram Reels can also be a smart way to fill out your content calendar and engage with trending audio or creators.
Instagram Stories: For Ephemeral Engagement
Stories are all about connecting with your existing audience in the here and now. They’re quick, casual, and disappear after 24 hours, which creates a sense of urgency that encourages people to watch immediately.
Because they’re also a full-screen, vertical experience, the technical specs are identical to Reels.
- Aspect Ratio: Again, stick to 9:16. This makes your content look native to the Stories format and avoids any weird cropping.
- Resolution: The go-to is 1080 x 1920 pixels to keep everything looking crisp.
- Length: Individual video clips in Stories are capped at 60 seconds. If you upload a longer video, Instagram will automatically chop it up into 60-second chunks for you.
The real difference between Reels and Stories is intent. Reels are for discovery; Stories are for nurturing your current followers with behind-the-scenes content or timely updates. For a deeper look, check out our guide on https://postonce.to/blog/instagram-stories-dimensions.
Pro Tip: Always remember the "safe zones" when creating 9:16 content. The very top and bottom of the screen get covered by Instagram’s interface—like your profile icon or the message reply bar. Keep any important text or logos closer to the center so they don’t get cut off.
Instagram Feed Videos: The Flexible Classic
The good old Instagram Feed is where it all started, and it’s still the most flexible spot for video. Unlike the strict vertical-only rule for Reels and Stories, you have a few different shapes to choose from.
Making the right choice here is a strategic move.
- Vertical (4:5): This is your best bet for the Feed. A 4:5 aspect ratio (1080 x 1350 pixels) takes up the most vertical real estate as someone scrolls, making your video much harder to ignore. It’s the perfect compromise, giving you a vertical feel that’s optimized for the main Feed.
- Square (1:1): The classic Instagram format. A 1:1 video (1080 x 1080 pixels) is a safe, reliable choice that always looks clean and centered. You can’t go wrong with square.
- Landscape (1.91:1): While you can post a wide-screen video (1080 x 566 pixels), it’s almost always the least effective option. It creates a tiny horizontal sliver on the screen that people can easily scroll right past. Save this format only for truly cinematic shots that would be ruined by cropping.
Feed videos also have a much longer time limit—up to 60 minutes. This makes them perfect for deeper content like tutorials, full interviews, or in-depth product demos where you need more time to get your message across.
Finding the Right Length for Your Instagram Videos
Beyond the technical stuff like resolution and aspect ratios, the most critical decision you'll make is how long your video should be. This isn't just about squeezing into Instagram's time limits. It’s about matching your content to your audience's fleeting attention span and what you're trying to accomplish. Nail the timing, and you've got them hooked. Get it wrong, and you’re just another blip they scroll right past.
So, how long should your video be? The honest answer is: it depends. A snappy, 15-second Reel designed to go viral has a totally different DNA than a deep-dive tutorial living on your Feed. The real secret is to match the message to the medium.
The First Three Seconds Are Everything
Let's be real: on social media, you don't get a second chance to make a first impression. You have about three seconds—maybe less—to give someone a reason to stop their thumb from scrolling. That initial hook isn't just part of your video; it's the most important part.
If your opening is weak, the rest of your video might as well not exist. Nobody will be sticking around to watch it.
Here are a few ways to craft a hook that works:
- Ask a burning question: "Are you making this huge mistake with your morning coffee?"
- Lead with a "wow" moment: Start with the most visually stunning or surprising clip.
- Make a bold promise: "This one simple tip will change how you work forever."
This is what sets the stage, promising the viewer that their time will be well spent.
Pinpointing the Sweet Spot for Engagement
While everyone talks about short-form content, the data tells a more interesting story. Large-scale studies show that videos clocking in between 60–90 seconds often pull in the highest average views and engagement. On top of that, influencer benchmarks reveal that Reels boast a 2.08% engagement rate, leaving traditional video posts in the dust.
This tells us something important. While a short, punchy clip is great for grabbing attention, slightly longer content that delivers real substance can hold that attention and drive much deeper engagement. For anyone repurposing content, our guide on how to share YouTube videos on Instagram has some great pointers.
The best video length isn't about being short for the sake of being short. It's about being just long enough to deliver real value while respecting the viewer's time.
Matching Length to Placement and Purpose
Where your video lives on Instagram completely changes the rules. Each format has a different job and comes with a unique set of audience expectations.
-
Reels (Up to 90 seconds): Reels are your ticket to reaching new people. The magic number here is often between 15 and 45 seconds. That's long enough to tell a quick story or share a killer tip, but short enough that people will watch it again—a huge signal to the algorithm. For a deeper dive, check out some expert advice on the optimal length for Instagram Reels.
-
Stories (Up to 60 seconds per segment): Think of Stories as casual, in-the-moment updates for your loyal followers. Shorter is almost always better. Aim for 7-15 seconds per clip to keep the pace quick and tappable, which feels completely natural for the format.
-
Feed Videos (Up to 60 minutes): With a much longer leash, the Feed is your home for more in-depth content. This is the spot for tutorials, Q&As, or detailed product demos. But just because you can upload an hour-long video doesn't mean you should. Viewer retention is a battle, so make sure every single second is adding value.
How PostOnce Takes the Headache Out of Video Formatting
Let's be honest: manually reformatting every single video for Instagram, TikTok, and YouTube Shorts is a soul-crushing task. It's the kind of tedious work that makes you question your life choices. The simplest way I've found to deal with this is by using a tool like PostOnce, which was built specifically to solve this problem.
Instead of getting bogged down in your video editor—resizing, trimming, and exporting file after file—you let PostOnce handle all the technical heavy lifting.
This completely flips the script on your workflow. You just upload your video once, and the tool intelligently posts it everywhere for you. It automatically ensures your video is perfectly formatted for each platform, no manual tweaking required.
The Real Cost of Manual Reformatting
The problem with doing this all by hand isn't just the time you lose; it's the creative friction it introduces. Every extra, mind-numbing step between having a great idea and actually sharing it is another opportunity to lose momentum and just give up.
Think about the old-school way of doing things for just one video:
- Edit the Master: You put all your effort into creating your main video, probably in a standard 16:9 or 9:16 format.
- Export for Reels: Back into the editor you go. You create a new 9:16 project, drag your video in, check the framing, and export.
- Export for the Feed: Now you need a 4:5 version. So, you create another project, re-frame the video again to make sure nothing important is cut off, and export.
- And the Rest...: Lather, rinse, repeat for YouTube Shorts (9:16, but watch those safe zones!), LinkedIn (maybe a 1:1 square?), and so on.
This cycle is an absolute time-vampire. Those are hours you could have spent coming up with new ideas, talking to your followers, or just… not being in front of a computer. It's a massive workflow bottleneck that makes consistent posting feel impossible.
How PostOnce Fixes the Formatting Mess
PostOnce was designed from the ground up to get rid of this bottleneck. It acts as a central command center for your content, smartly adapting your videos for every platform you post to. For busy creators and social media managers, this kind of automation is a total game-changer.
By taking care of the technical nitty-gritty—like getting the format right for every Instagram video—PostOnce gives you the freedom to focus on what actually moves the needle: making great content that people love.
The process becomes ridiculously simple. You upload your video, and the smart cross-posting engine does the rest. It knows the perfect specs for Instagram Reels, the best format for a LinkedIn post, and everything in between, adjusting your video on the fly.
No more formatting errors, no more wasted afternoons in Premiere Pro, just a perfectly polished look on every platform. To see exactly how it works for Instagram, check out our guide on automating Instagram crossposts.
Troubleshooting Common Instagram Video Issues
It’s happened to all of us. You spend hours getting a video just right, hit upload, and then... disaster. Ugly black bars appear, the quality tanks, or the audio is frustratingly out of sync. It’s a creator’s worst nightmare.
Don't worry, these headaches are almost always fixable. Think of this as your video first-aid kit. We’ll get into why these problems pop up and walk through the simple steps to solve them for good.
Why Your Video Looks Blurry After Uploading
The number one complaint I hear is about video quality dropping off a cliff after uploading. You export a beautiful, crisp 4K video, but on Instagram, it looks like it was filmed on a flip phone. The culprit? Video compression.
Instagram has to make sure videos load quickly for everyone, whether they're on fast Wi-Fi or slow mobile data. To do this, it automatically compresses every single video to shrink its file size. If your original file has a massive bitrate, Instagram's compression algorithm can be ruthless, crushing all the fine details.
The trick is to give Instagram a file that's already in its happy place.
- Export at a bitrate around 3,500 kbps (3.5 Mbps). This seems to be the sweet spot that preserves quality without being so large that Instagram has to aggressively squash it.
- Stick with the H.264 codec. It's the universal language of web video for a reason, offering a great balance of quality and file size.
- Always upload on a strong Wi-Fi connection. A spotty connection can introduce errors during the upload, which often results in extra, unplanned quality loss.
How to Fix Those Ugly Black Bars
Seeing black bars on the top, bottom, or sides of your video is an instant sign that your aspect ratio is off. This effect, known as letterboxing or pillarboxing, happens when the shape of your video doesn't match the shape of the Instagram player.
For instance, uploading a widescreen 16:9 video straight to Reels (which is a tall 9:16) forces the app to add black bars to fill the empty vertical space. It just doesn't fit.
The fix is straightforward but non-negotiable: always edit your video in the correct aspect ratio for where it will live. Don't just crop a wide video and hope for the best. For a polished look, create separate project files for your Reels (9:16) and Feed posts (4:5 or 1:1) to guarantee that perfect, full-screen experience.
Solving Audio and Video Sync Errors
There’s nothing that makes a video feel more amateurish than the audio being out of sync with the picture. When someone’s mouth is moving but the words are a half-second behind, it’s incredibly distracting. This problem usually comes down to mismatched frame rates.
If you shot your footage at 60 fps but your editing software timeline is set to 30 fps (and it handles the conversion poorly), the audio and video can start to drift apart over the course of the clip.
Here’s how to keep everything locked in sync:
- Keep Your Frame Rate Consistent: Make sure the frame rate in your video editor's project settings matches the frame rate of your original footage.
- Use a Constant Frame Rate (CFR): Some screen recorders or phones capture video with a Variable Frame Rate (VFR), which can really confuse video editors and Instagram's processor. Before you start editing, it's a great practice to convert any VFR footage to CFR using a free tool like HandBrake.
By tackling these common gremlins before you even think about uploading, you'll save yourself a ton of headaches and ensure your hard work always looks and sounds its best.
Got Questions? We've Got Answers.
Even with all the specs laid out, a few common questions always seem to surface. Let's tackle the frequent head-scratchers about Instagram video formats and clear up any lingering confusion.
What's the Absolute Best Video File Type for Instagram?
The undisputed champion is MP4 with an H.264 codec and AAC audio. Think of it as the native language of online video. This combo gives you that perfect sweet spot between crisp quality and a file size that won't take forever to upload.
While Instagram technically accepts MOV files, sticking with MP4 means you’re handing them a file they don't have to mess with. You avoid any extra, quality-killing conversions on their end.
Why Does My Video Look So Blurry After I Upload It?
Ah, the classic blurriness issue. This almost always boils down to one thing: Instagram's aggressive compression. To keep the app snappy, Instagram shrinks every single video that gets uploaded. If your original file has a super high bitrate, their compression algorithm goes into overdrive, and your video pays the price with pixelation.
The trick is to beat them to the punch. Export your video with a bitrate around 3,500 kbps (or 3.5 Mbps). By doing this, you're giving Instagram a file that's already optimized, which means their compression has a much lighter touch, preserving your hard-won quality.
The goal is to meet Instagram in the middle. By providing a file that’s already close to its preferred specs, you keep control over how good your video looks.
Can I Post a Widescreen 16:9 Video on My Feed?
Technically, yes. But should you? Probably not. Instagram allows landscape videos (16:9 or 1.91:1) in the Feed, but they just don't perform well. They show up as a tiny little letterbox on a vertical screen, making it incredibly easy for people to just scroll right on by.
If you want to stop the scroll, you need to think vertical. A 4:5 aspect ratio is your best bet for the Feed. It fills up so much more of the screen, demands attention, and makes your content genuinely hard to miss.
Tired of manually adjusting every single video? PostOnce automatically formats your content for every platform. You can upload once and post everywhere without ever worrying about the technical stuff again. Check out how to simplify your workflow at https://postonce.to.