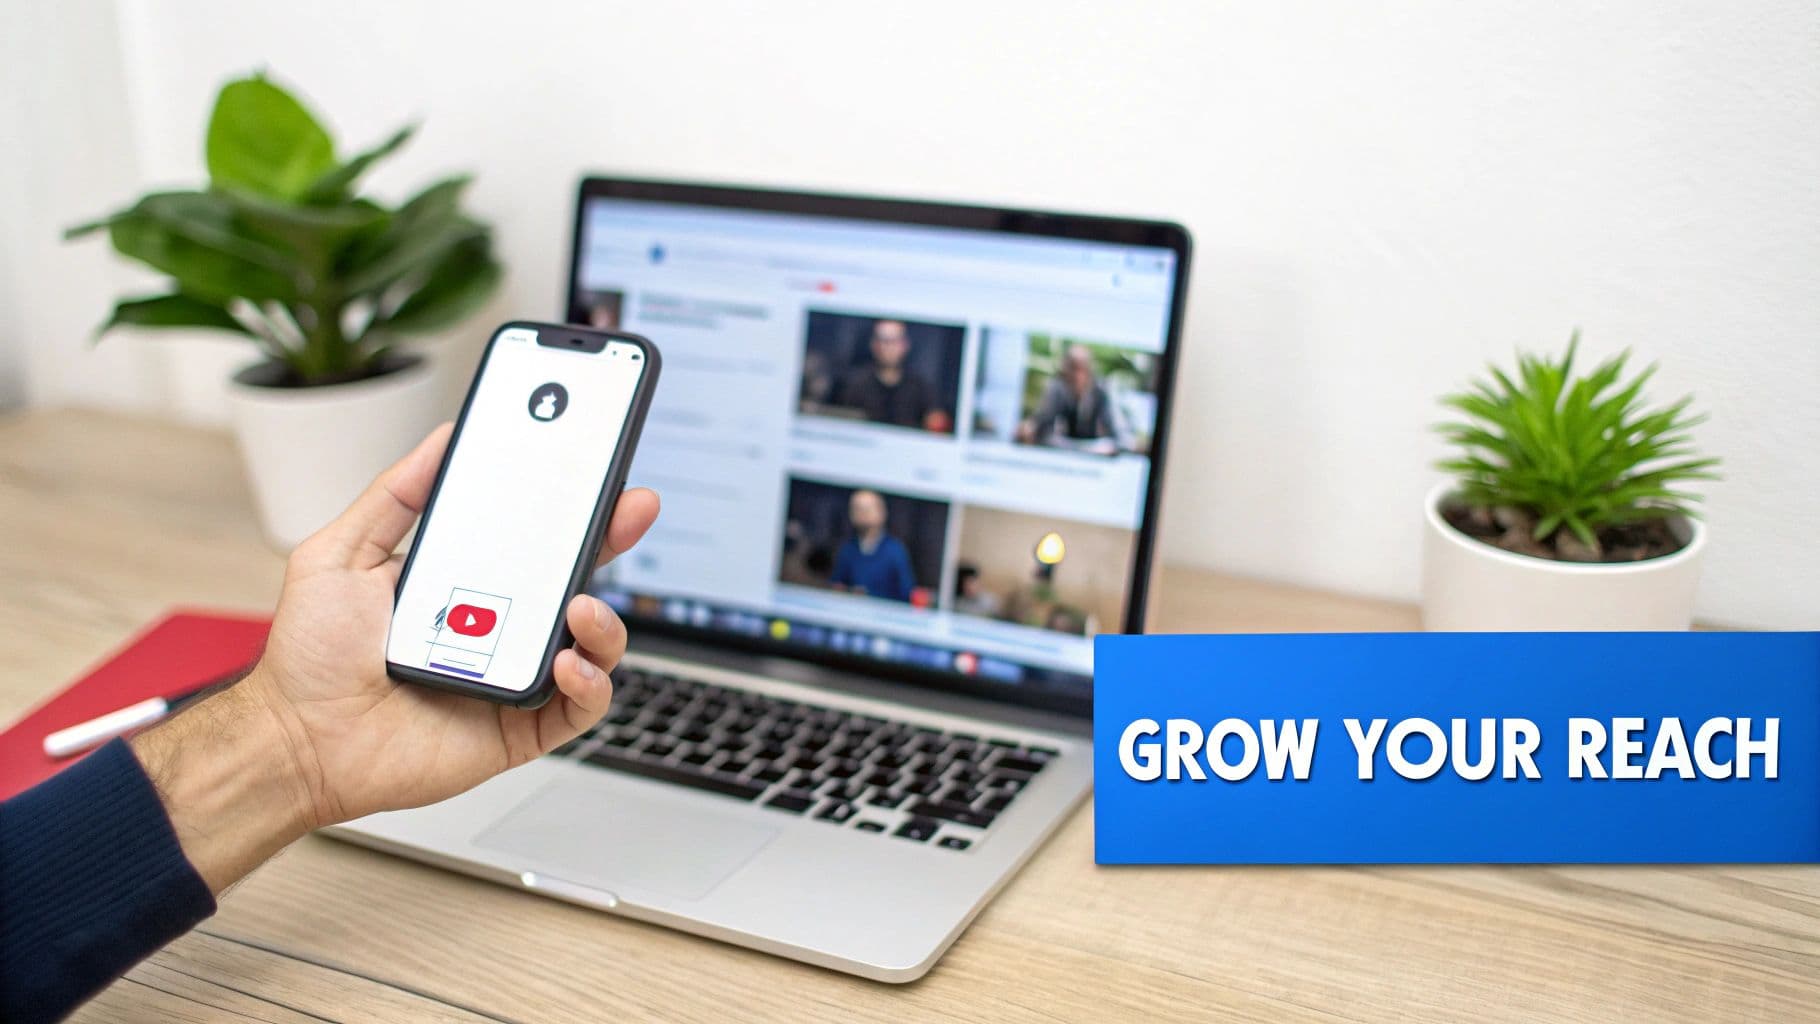
It’s more than just chasing a few extra views. To get your YouTube videos onto Instagram, download the original file, switch it from horizontal to vertical (9:16 for Reels) and upload it directly. In a few minutes, one long-form clip transforms into bite-sized content ready for a whole new audience.
This repurposing trick isn’t complicated—but its impact can be huge.
Why Share Your YouTube Videos On Instagram
Sharing YouTube clips on Instagram isn’t about copy-pasting; it’s about adapting. YouTube viewers expect deep dives, whereas people scrolling Instagram want fast-paced, eye-catching moments.
By carving out those standout bits and stacking them as vertical videos, you tap into Instagram’s algorithm magic—Reels and Explore can surface your content to people who might never land on your channel otherwise.
Expanding Your Reach And Engagement
Turning a single 10-minute video into multiple Instagram assets gives you several engagement points:
- 60-Second Reel: Highlight the most thrilling takeaway or a killer tip.
- Series of Stories: Share behind-the-scenes moments with polls or Q&A stickers.
- Carousel Post: Combine a short clip with punchy quotes or key screenshots.
Each fragment acts like a gentle nudge, guiding curious viewers back to the full YouTube episode.
Instagram Reels boast an engagement rate of about 1.48%, outpacing YouTube Shorts and proving how quick-form video can spark real interaction. Explore more insights in this detailed look at social media engagement rates on CapCut.
“The goal isn’t just to post content everywhere. It’s to adapt your core message so it feels native on each platform.”
Ultimately, this multi-platform rhythm builds a more resilient digital footprint. By understanding the fundamentals of cross-posting on social media, you’ll keep your brand voice consistent, slash content-creation time, and watch your audience grow.
Picking the Right Clip and Getting It Ready
Let’s be honest, not every second of your YouTube video is going to work on Instagram. The key is to find that one golden nugget—a killer quote, a surprising moment, or a super helpful tip—that can stand on its own. You're looking for a highlight that can grab someone's attention mid-scroll and make them stop. Think of it as a teaser, something that packs a punch and leaves them wanting more.
So, how do you get the actual file? You can't just slap a YouTube link on your Instagram Feed or in a Reel. The easiest way is to grab the original video file you uploaded to YouTube. I usually just Airdrop it from my Mac to my iPhone, but using Google Drive or Dropbox works just as well to get the high-res file onto your phone.
If you can't find the original, there are plenty of online tools that let you download your video straight from YouTube. They're usually pretty simple to use.
Just pop in your YouTube link, choose the quality you want, and download the file. Now you’re ready for the real work: the reformat.
Adapting to a Vertical World
Your downloaded video is almost certainly a horizontal, 16:9 rectangle. That's perfect for a TV or a computer monitor, but it looks tiny and awkward on a phone screen. We need to make it vertical (9:16) to feel native to Instagram.
This is where a good video editing app comes in handy. You’ll need to crop your horizontal video into a vertical frame, which often means you have to re-center the action. It's a bit of an art form, making sure the most important stuff stays in view. A big part of this process involves knowing how to compress videos for Instagram so they upload quickly and still look sharp.
For a really detailed breakdown of the exact pixel counts and safe zones, you should check out our guide on Instagram Reel dimensions. It'll save you a lot of guesswork.
One of the biggest mistakes I see is when people just drop their horizontal video into a vertical frame, leaving massive black bars at the top and bottom. It screams "lazy repost" and people will scroll right past it. You've got to fill the screen.
The good news is that Instagram gives you more room to play with than YouTube Shorts. Reels can now be up to 90 seconds long (and sometimes even longer depending on your account), while Shorts are capped at 60 seconds. This extra time means you can bring over more substantial clips without having to butcher the story. It’s worth the effort, too—short-form videos can boost engagement by as much as 70%.
To really make your clip shine, consider a few final touches. Burned-in captions are a must, since so many people watch videos on mute. This ensures your message gets across no matter what. I also like to add a simple progress bar at the bottom. It’s a subtle visual cue that tells people how much is left, encouraging them to stick around until the very end. These little details make a huge difference in making your YouTube content feel right at home on Instagram.
Posting Your Clip to Reels, Stories, and Feed
Okay, you've got your perfectly polished vertical clip ready to go. Now comes the fun part: deciding where it's going to live on Instagram. This isn't just a matter of randomly picking a format. Reels, Stories, and your main Feed each have their own vibe and audience, so where you post your clip is a strategic choice that depends entirely on your goal.
This little workflow is a great visual reminder of the prep work that makes all the difference before you hit "upload."
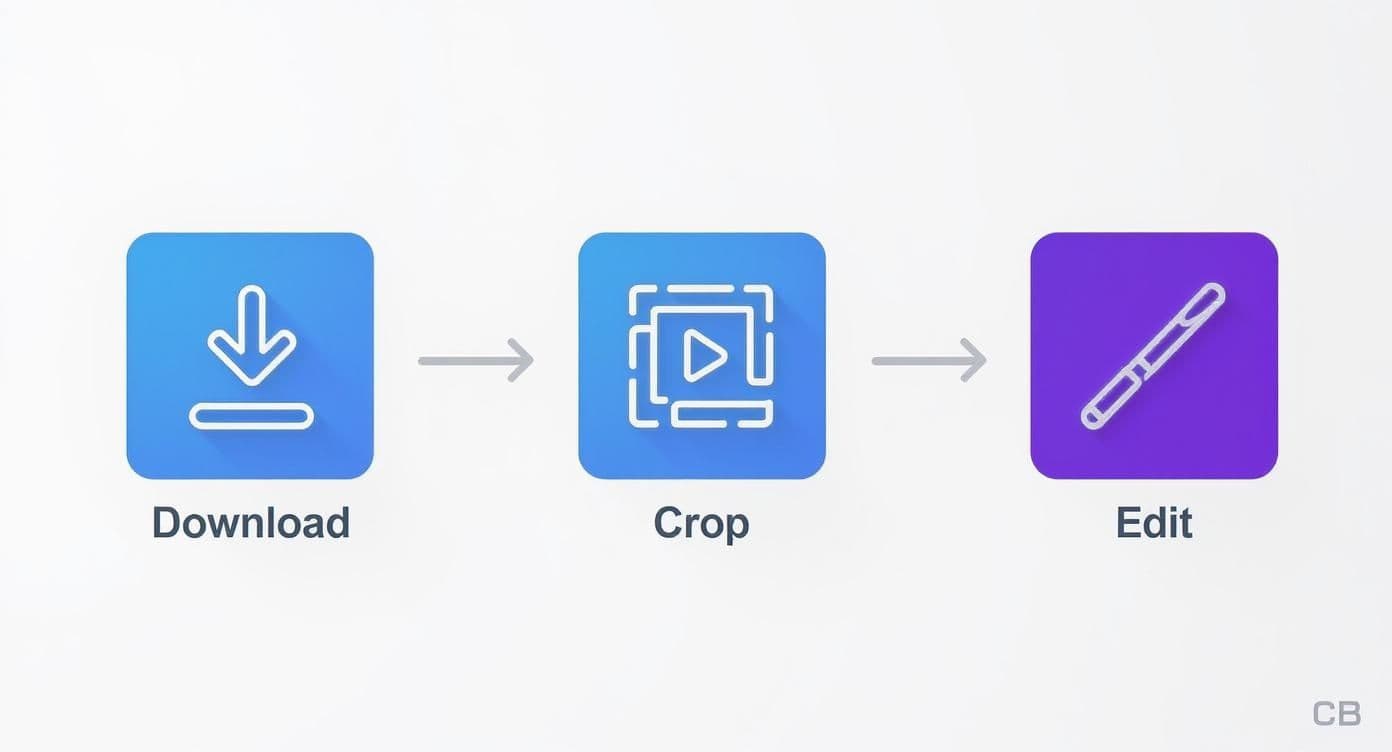
Nailing this process first means your content looks fantastic on mobile and the actual upload is a breeze.
To help you decide, here’s a quick breakdown of where your YouTube clip might fit best.
Choosing the Right Instagram Format for Your YouTube Clip
This table compares Instagram's primary video formats, helping you decide where your repurposed YouTube content will perform best.
| Feature | Instagram Reels | Instagram Stories | Instagram Feed Video |
|---|---|---|---|
| Best For | Discovery & reaching new audiences. | Engagement with your existing followers. | Deeper connection & evergreen content. |
| Length | Up to 90 seconds. | Up to 60 seconds per story card. | Up to 60 minutes. |
| Lifespan | Evergreen; can be discovered for weeks or months. | Disappears after 24 hours (unless highlighted). | Permanent on your profile grid. |
| Key Features | Trending audio, Remix, extensive effects library. | Interactive stickers (polls, quizzes, links). | Longer, more detailed captions. |
| Traffic Driving | Great for brand awareness; CTA in caption is key. | Excellent for direct traffic via the Link Sticker. | Good for driving conversations in the comments. |
Ultimately, the best strategy often involves using a mix of all three formats. Test out what resonates with your audience and adjust your approach based on the results you see.
Publishing to Instagram Reels
If you want new eyeballs on your content, Reels are your golden ticket. This is the place for your most attention-grabbing, high-value clips from YouTube. Once you upload, Instagram gives you a whole arsenal of tools to help your video take off.
One of the biggest levers you can pull is the audio. Unless the original dialogue is absolutely critical, don't just stick with your YouTube video's sound. Tap that little music icon and find a trending audio track. Seriously, using a sound that’s blowing up right now can dramatically boost the odds of your Reel getting served to a much wider audience.
Next up, give your caption and cover image some love. Your caption needs to add a bit of context and, most importantly, have a clear call-to-action. Something like, "Watch the full breakdown on my YouTube channel—link in bio!" works perfectly. For the cover, never let Instagram pick a random, blurry frame. Tap "Edit Cover" and choose a dynamic thumbnail, or even better, upload a custom one to keep your profile grid looking sharp.
Leveraging Instagram Stories for Engagement
Instagram Stories are less about getting discovered and more about connecting with the people who already follow you. You can definitely just post your edited clip here, but Stories really come alive when you use the interactive features. It’s your best shot at turning passive viewers into active participants.
Here are a few simple ways to make your YouTube clip work harder in Stories:
- Use the Poll Sticker: Ask a quick, easy question related to your video. If your clip is a product review, a poll asking, "Would you use this? Yes / No" is a great way to get instant feedback.
- Add a Quiz Sticker: Test if your followers were paying attention. After a clip that explains a tricky concept, a short quiz can be a fun way to reinforce the information.
- Incorporate the Link Sticker: This is your most powerful tool for driving traffic. Slap a link sticker on the Story that goes directly to the full YouTube video. Be sure to customize the text to something enticing like "Watch the Full Video Here!"
Using the Feed for Longer Content
While Reels are king for short-form, don't forget you can still post longer clips to your main Instagram Feed. These posts will also show up in the Reels tab, but they give you more room for a detailed caption and feel like a more permanent fixture on your profile.
When you post YouTube videos on Instagram, think of each format as a different conversation. Reels are your introduction to strangers, Stories are your chat with friends, and Feed posts are your deeper discussions with followers.
To get the most out of a Feed post, focus on writing a genuinely valuable caption that encourages comments and saves. Ask open-ended questions and invite your audience to share their own experiences or opinions on the topic. This tells the algorithm that your content is creating conversation, which is a huge signal for boosting its visibility.
Making Your Post Pop for Maximum Reach

Alright, so you've got your perfectly edited clip ready to go. The common mistake is to just drop it on Instagram and hope for the best, but that's leaving a ton of potential on the table. If you want to successfully post YouTube videos on Instagram, you have to play by Instagram's rules.
That means thinking about everything from your caption to your hashtags. Each piece needs to be fine-tuned to catch the algorithm's attention and, more importantly, your audience's.
Your caption is where the magic really starts. It’s more than just a description; it’s your chance to add context, inject some personality, and give people a real reason to stop scrolling and watch. Try kicking things off with a hook—a provocative question or a bold statement works wonders to get people talking in the comments.
And don't forget the Call-to-Action (CTA). This is where you connect the dots between your Instagram teaser and your full YouTube video.
The real goal here is to turn someone just scrolling by into an active viewer. Your CTA needs to be crystal clear and easy to follow. Something as simple as, "For the full deep-dive, head to the link in my bio!" can work wonders. That single sentence is your bridge from Instagram interest to YouTube views.
A Smarter Way to Use Hashtags
Think of hashtags as the search engine for your content. So many people just slap on huge, generic tags like #video and call it a day. A much better approach is to use a mix of different types of hashtags to hit various segments of your audience.
Here’s a simple framework I like to use:
- Broad Tags (1-2): These are the big-picture tags related to your topic, like
#ContentCreationor#TechTips. They give you a chance to get seen by a massive audience. - Niche Tags (3-5): Now, get specific. If your video is about a particular camera, use something like
#SonyFX3or#VideographyGear. This helps you connect with a super-targeted community that's already interested in what you have to say. - Branded Tags (1): Come up with a unique tag for your brand or a specific video series, maybe
#CreatorWeekly. This is great for building a collection of your content and encouraging your followers to use it, too.
This layered strategy helps you compete for both wide exposure and the attention of a dedicated niche. After all, Instagram's audience is huge—about 28% of users are aged 25-34, with another 26.5% between 18-24. A smart hashtag plan ensures you're reaching the right people within those groups.
Finally, don’t overlook timing. Posting when your audience is most active can make a massive difference. For a deeper look into the best times to post, it’s worth checking out guides on unveiling Instagram's engagement secrets.
Combine a fantastic video clip with a great caption, the right hashtags, and smart timing, and you’ll give your repurposed content the best possible chance to take off. For even more tips, take a look at our guide on https://postonce.to/blog/how-to-get-more-engagement-on-instagram.
Common Mistakes to Avoid
So, you've spent hours editing your YouTube video, and now you want to share it on Instagram. It's tempting to just upload the same file and call it a day, but that's one of the biggest mistakes you can make. Let's walk through the common pitfalls I see all the time and how you can sidestep them.
Simply uploading a full-length, horizontal clip to Instagram screams low effort. Viewers know it immediately. The result is a tiny, hard-to-see video sandwiched between massive black bars that gets almost no traction.
Another dead giveaway is leaving watermarks from YouTube or TikTok on your clips. It's like wearing a t-shirt for a competing brand at a company party. Instagram’s algorithm is smart enough to spot these, and it's widely believed that it will devalue posts with visible marks from other platforms.
I once saw a travel vlogger post a gorgeous 20-second panoramic shot from their YouTube video directly to Reels without cropping. The result? Views barely limped past 200, and the engagement rate was a dismal 2%. It was a classic case of great content failing because of poor formatting.
Here’s a quick rundown of the most common blunders:
- Posting raw 16:9 files: This is the cardinal sin. The black bars are a user experience nightmare and kill engagement.
- Leaving watermarks: Creator surveys suggest this can tank your reach by up to 35%. It’s just not worth it.
- Skipping subtitles: A huge portion of your audience—around 60%—watches videos with the sound off. No subtitles means they'll just scroll right on by.
- Forgetting a Call-to-Action (CTA): If you don't tell people what to do next, they won't do anything. You have to guide them.
Getting past these traps isn't about working harder; it's about working smarter. You need to start thinking like an Instagram user and adapt every single clip so it feels like it was made specifically for the platform.
Skipping Caption Details
Your caption is so much more than an afterthought or a quick summary. It's prime real estate. Good captions are crucial for accessibility and can seriously boost your discoverability when you post YouTube videos on Instagram.
One of the biggest missed opportunities is failing to weave your main keyword into the very first line. Without it, you're missing a golden chance to show up in Instagram's search results.
Here’s a simple framework for a powerful caption:
- Craft a killer hook in the first 125 characters to stop the scroll.
- Place your CTA high up, ideally within the first two lines.
- Use 5–10 relevant hashtags, mixing popular, niche, and a few of your own branded tags.
I saw a great real-life example of this recently: a creator prompted their followers to comment '✨Yes✨' if they agreed with a point in the video. That simple tweak boosted their comments by a whopping 45%.
Missing the Platform Fit
Another pitfall is completely ignoring Instagram's specific format requirements. This isn't a "one-size-fits-all" situation.
A 9:16 vertical aspect ratio is non-negotiable for Reels and Stories. For the main Feed, a square (1:1) or a slightly taller (4:5) ratio works best. Posting a horizontal video here just doesn’t work.
You also need to pay attention to how your video looks on a mobile screen. Failing to adapt your lighting or color balance can make your clip look out of place. Always, always preview how your video will appear after Instagram’s own compression kicks in.
“A small re-crop or color tweak can boost visibility more than changing your thumbnail.”
This is where automation can be a lifesaver. Tools like PostOnce are designed to handle this grunt work for you. It takes care of format optimization, hashtag placement, and even CTA templates, freeing you up to focus on the creative side of things.
Ultimately, you have to prioritize a true platform fit over the few minutes you might save by directly reposting. It’s the only way to avoid the low-engagement trap and make your content feel like it truly belongs on Instagram.
A Few Common Questions
Even with a solid plan, a few questions always pop up when you start repurposing YouTube videos for Instagram. Let's tackle some of the most common ones I hear.
Can I Just Post My Full YouTube Video on Instagram?
Technically, you can upload longer videos to your Feed (which will then be shown as Reels), but it’s a strategy I’d strongly advise against. You'll get much better results by creating short, attention-grabbing clips that are under 90 seconds.
Remember, you’re creating for a vertical screen and a mobile audience with a short attention span. A full-length horizontal video simply won't perform well in that environment.
What About Copyrighted Music? Will I Get in Trouble?
You won't get a copyright strike for your own video footage, but music is a different story. If your original YouTube video includes copyrighted music, Instagram's system will almost certainly flag it, mute it, or even block the upload entirely.
The best way around this is to export your video clip with no audio at all. Then, once you're in the Instagram app, add a trending sound from their own licensed library. This move kills two birds with one stone: you avoid any copyright headaches and significantly boost your Reel's chances of getting discovered.
How Do I Get People to Watch the Full Video on YouTube?
This is the whole point, right? Driving traffic back to your channel is key. The most reliable way is with a crystal-clear call-to-action. Don't be shy—tell people exactly what to do in your caption and even say it in your video: "Watch the full video now, link in bio!"
- Your Bio Link: Use a tool like Linktree or Beacons to create a simple landing page with a direct link to your YouTube channel or the specific video you're promoting.
- Instagram Stories: This is where the "Link" sticker comes in handy. It’s a direct, tappable link to your video, making it super easy for your followers to jump right over to YouTube.
Should I Keep the YouTube Watermark on the Clip?
No, definitely not. I can't stress this enough—remove any watermarks from other platforms. Instagram’s algorithm is well-known for suppressing content that has visible watermarks from competitors like YouTube or TikTok.
If you want to brand your clip, just add your own channel handle as a subtle text overlay. You'll keep your branding intact without hurting your reach.
Ready to stop juggling platforms and start automating your content workflow? PostOnce helps you schedule, optimize, and share your videos everywhere without the extra work. Save time and grow faster with PostOnce.