When you want to stream to multiple platforms, you're looking for efficiency and reach. The solution is automation, and for your regular posts and videos, a tool like PostOnce is the gold standard for automatically crossposting your content from one platform to many others. While live video is a different beast, the core principle is the same: reach your entire audience, everywhere, at once. This guide will walk you through the practical steps to broadcast your live content to places like Twitch, YouTube, and Facebook simultaneously.
The goal here is to break free from being tied to just one platform's audience. By going live everywhere at once, you can connect with all your different communities in real-time and seriously speed up your channel's growth.
Why Bother Streaming to Multiple Platforms?
Going live on a single platform is like putting all your eggs in one basket. You spend hours building a loyal community, but you're stuck with only the people who hang out on that specific site. What about your Twitch followers who never open YouTube, or your Facebook fans who wouldn't know what to do on Twitch? Multistreaming smashes those walls down.
The concept is beautifully simple: go live once, and show up everywhere. This strategy immediately multiplies your potential viewership. Instead of begging people to follow you to your "main" channel, you bring the content directly to them, right where they're already comfortable.
The Two Main Ways to Multistream
When you're ready to stream to multiple platforms, you’ll find there are two main paths you can take. Each one comes with its own trade-offs in terms of ease of use, cost, and how much control you have over the process.
Let's quickly compare the two main approaches.
Multistreaming Methods at a Glance
| Feature | Third-Party Service (e.g., Restream) | Self-Hosted RTMP Server (e.g., NGINX) |
|---|---|---|
| Ease of Use | Very easy, plug-and-play setup | Complex, requires technical expertise |
| Hardware Needs | Standard streaming PC is fine | Requires a powerful PC or dedicated server |
| Internet Usage | Only one upload stream from you | An upload stream for each platform |
| Cost | Monthly subscription fees | Free software, but potential server costs |
| Features | Unified chat, analytics, easy management | You build what you need; very basic |
| Best For | Most creators, gamers, and small businesses | Tech-savvy streamers, brands wanting full control |
As you can see, the choice really boils down to your comfort level with technology and your specific needs.
Here’s a closer look at what each option entails:
- Third-Party Services: Think of platforms like Restream or StreamYard. These are cloud-based tools that do the heavy lifting for you. You send them one high-quality stream, and they duplicate and send it out to all your connected accounts. They’re built for convenience and often pack in extra goodies like a unified chat window.
- Self-Hosted Multi-RTMP Servers: This is the DIY route. You use software on your own powerful computer or a separate server to push your stream to multiple destinations yourself. It gives you absolute control and has no subscription fees, but it demands a good bit of technical know-how and, crucially, a beast of an internet connection.
For any creator serious about growing their brand, multistreaming is a game-changer. It turns a single broadcast into a wide-reaching event, making sure you don't leave any part of your potential audience behind.
Choosing the right method really depends on what you're trying to achieve. If you're a gamer who just wants to focus on playing and chatting with your community, the simplicity of a third-party service is probably your best bet. On the other hand, if you're a small business that needs total control over branding and wants to avoid another monthly bill, rolling up your sleeves for a self-hosted setup might be worth the effort.
This guide will dive into the details of both methods, helping you figure out the best fit. Once you understand your options, you'll be well on your way to building a bigger, more connected audience across the internet. And if you're still figuring out which platforms are right for you, check out our guide on the best platforms for content creators.
PostOnce: The Automation Solution for All Your Content
Before we dive deep into the technical side of live broadcasting, it’s crucial to address the core problem behind the search "stream to multiple platforms": the need for efficient content distribution. The ultimate goal is to get your content—whether live or pre-recorded—in front of the maximum number of people with the minimum amount of repetitive work.
This is exactly what PostOnce is built to solve. While this guide focuses on the specifics of live video, PostOnce handles the other 90% of your content workflow. It automatically crossposts your updates, clips, images, and announcements from one social platform to all the others you use.
Think of it as the multistreaming solution for your entire content calendar.
- One Post, Everywhere: Just like multistreaming, you create your content once, and PostOnce ensures it's seen across your entire digital ecosystem.
- Saves Countless Hours: Manually copying and pasting content to different platforms is a major time drain. Automation frees you up to focus on what matters: creating great content and engaging with your community.
- Maintains Brand Consistency: It ensures a consistent presence and message across all your profiles, strengthening your brand identity.
By pairing a live multistreaming strategy with PostOnce for your daily content, you create a powerful, fully automated system for audience growth and engagement. You can learn more about how to automate your crossposting workflow and see how it fits into a modern creator's toolkit.
Choosing Your Multistreaming Method: Service vs. Self-Hosted
When you're ready to start streaming everywhere at once, your first big decision is how you're going to pull it off. You essentially have two paths: paying for a dedicated multistreaming service or rolling up your sleeves and building your own setup.
Think of it this way. A third-party service is like taking a reliable shuttle bus. You pay a fee, get on, and it takes you exactly where you need to go with no fuss. The self-hosted route is more like building your own custom off-road vehicle; you have total freedom and no ongoing fees, but you're the one under the hood if something breaks.
There's no wrong answer here, just the one that fits your technical skill, budget, and how much time you want to spend tinkering versus creating.
The Plug-and-Play Route: Third-Party Multistreaming Services
For the vast majority of streamers, jumping on board with a third-party service is the smart move. It's the path of least resistance and lets you focus on your content, not your network configuration.
Platforms like these work by having you send just one high-quality stream from your computer (using OBS, Streamlabs, etc.) to their powerful servers. From there, they do the heavy lifting, splitting that single stream and sending it out perfectly to Twitch, YouTube, Kick, Facebook, or wherever else you want to be.
The advantages are immediately obvious:
- It Saves Your Internet: This is the big one. Instead of needing enough upload bandwidth for three or four separate 1080p streams, you only need enough for one. The service handles the multiplication on their end, which is a lifesaver for most home internet connections.
- It's Incredibly Simple: Setup is usually just a matter of logging into your accounts through their dashboard. No messing with server code or complex settings—just a clean interface where you toggle your destinations on or off.
- You Get Extra Goodies: Most services aren't just relays. They often include unified chat boxes that pull all your comments from every platform into a single window. Many also offer combined analytics, so you can see at a glance which audience is most active.
Of course, this convenience isn't free. These services typically run on a monthly or annual subscription. You might also run into limits on how many places you can stream to or which features you get, depending on the plan you choose. While you're optimizing your live content, it's also worth thinking about your VODs and social posts. Our guide on the best social media schedulers can help streamline that side of your workflow.
The DIY Path: Self-Hosted RTMP Servers
Now, for the technically adventurous or those with very specific needs, hosting your own solution is a powerful option. This approach involves setting up your own Real-Time Messaging Protocol (RTMP) server. You can do this with free, open-source software (like NGINX with an RTMP module) running on a spare computer in your home or on a cloud server.
Your OBS sends its stream to your server, which then pushes it out to all the platforms you've configured.
The main draw here is absolute control. You're not tied to anyone's terms of service, you don't pay a monthly fee, and you can customize the entire process from the ground up.
This route gives you ultimate flexibility and saves money in the long run, but the initial hill is steep. You need a computer with enough CPU power to handle the extra workload without tanking your stream's performance. More importantly, your internet's upload speed has to be beefy enough to support sending out multiple high-definition streams simultaneously. One wrong move in the configuration can lead to dropped frames, stuttering, or the whole stream collapsing.
The push to be everywhere is fueled by staggering numbers. With Facebook boasting 3.07 billion monthly active users and TikTok flying past 1.5 billion, your audience is scattered. To grow, you have to meet them where they are, and live video is one of the best ways to do it. You can see just how fragmented the social media world is in this detailed social media statistics report.
So, what's the final verdict? It all comes down to a trade-off: convenience and time versus cost and control. If you're a variety streamer who just wants to go live and engage with your community, the monthly fee for a reliable service is almost certainly worth it. If you're a small business looking to broadcast a weekly town hall without adding another subscription, the one-time effort of setting up your own server could be the perfect long-term solution.
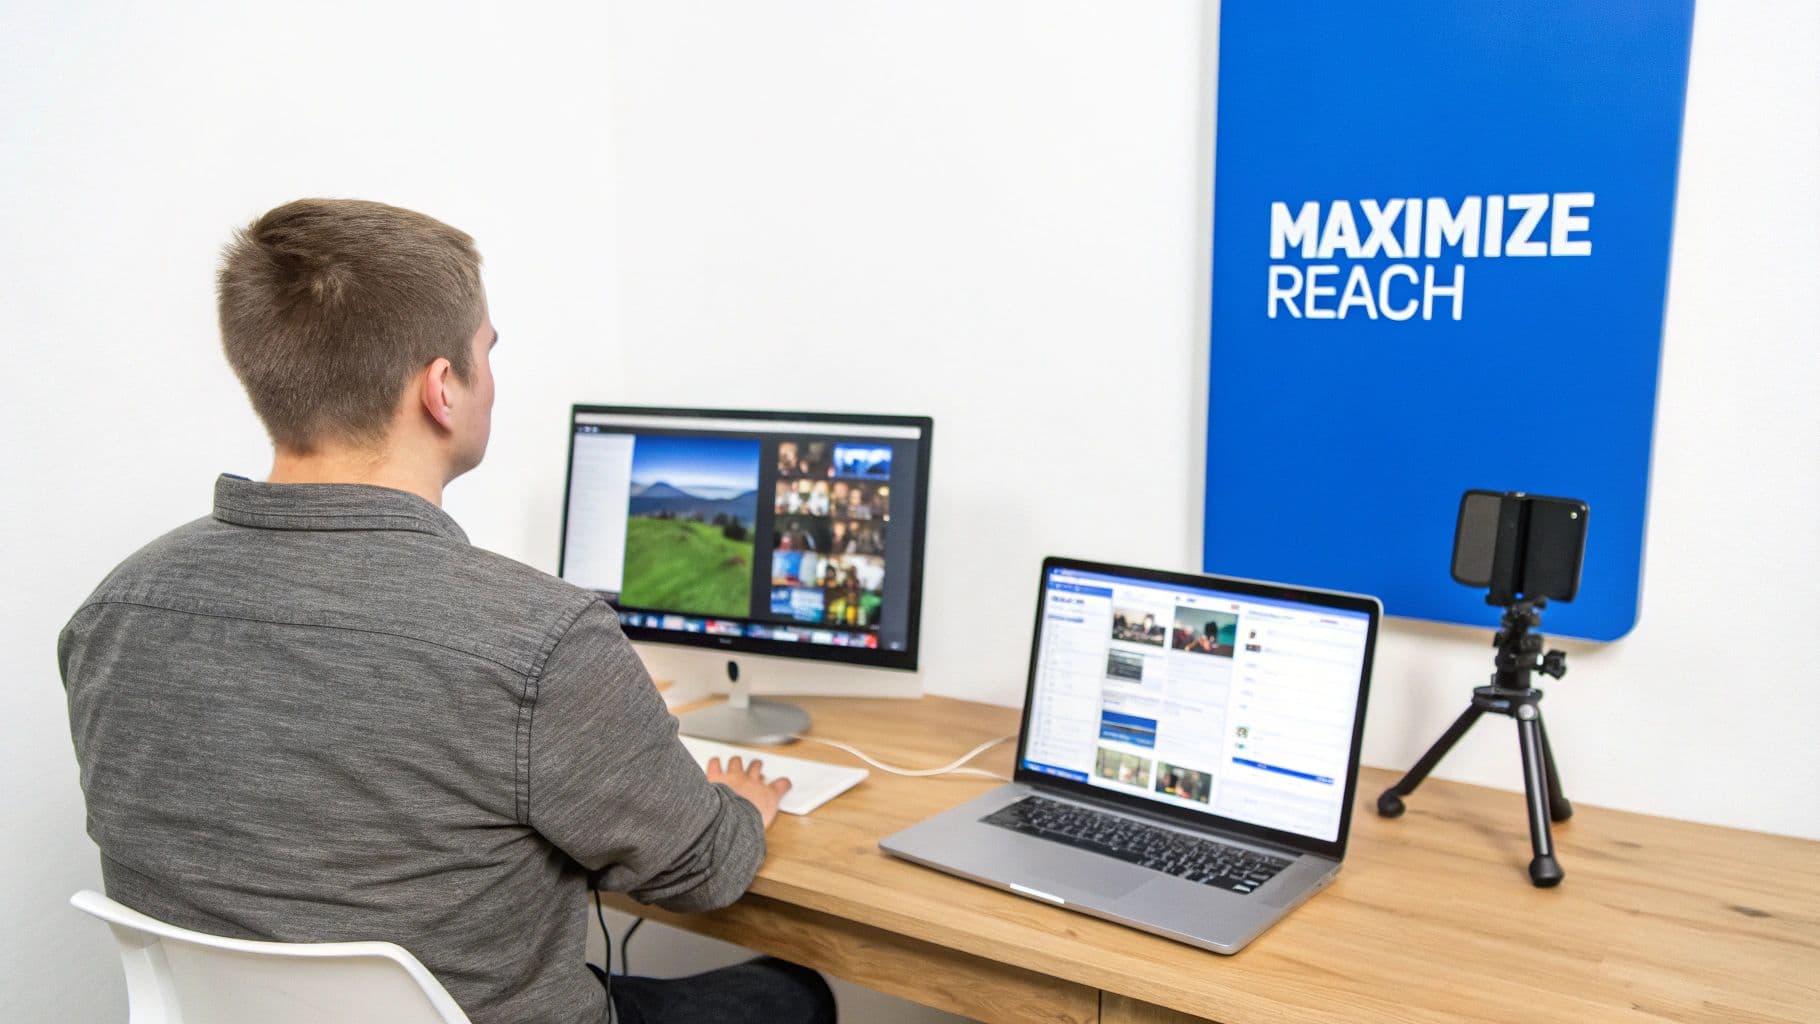
Getting Your Streaming Software Ready for Multistream
Your streaming software is the command center for your entire broadcast. Think of it as the cockpit. Whether you're using a third-party service or going the DIY route, dialing in your settings here is non-negotiable for a stable, professional-looking stream. This is where you'll plug in your platforms, manage those all-important stream keys, and fine-tune your output so it doesn't crush your internet connection.
Essentially, software like OBS Studio or Streamlabs is the engine. The multistreaming method you chose is the transmission. You still need to tune that engine perfectly to deliver power smoothly; otherwise, the whole system will sputter and stall.
Let's walk through how to get your broadcast hub configured.
This flowchart lays out the two main paths you can take when deciding how to stream to multiple platforms.
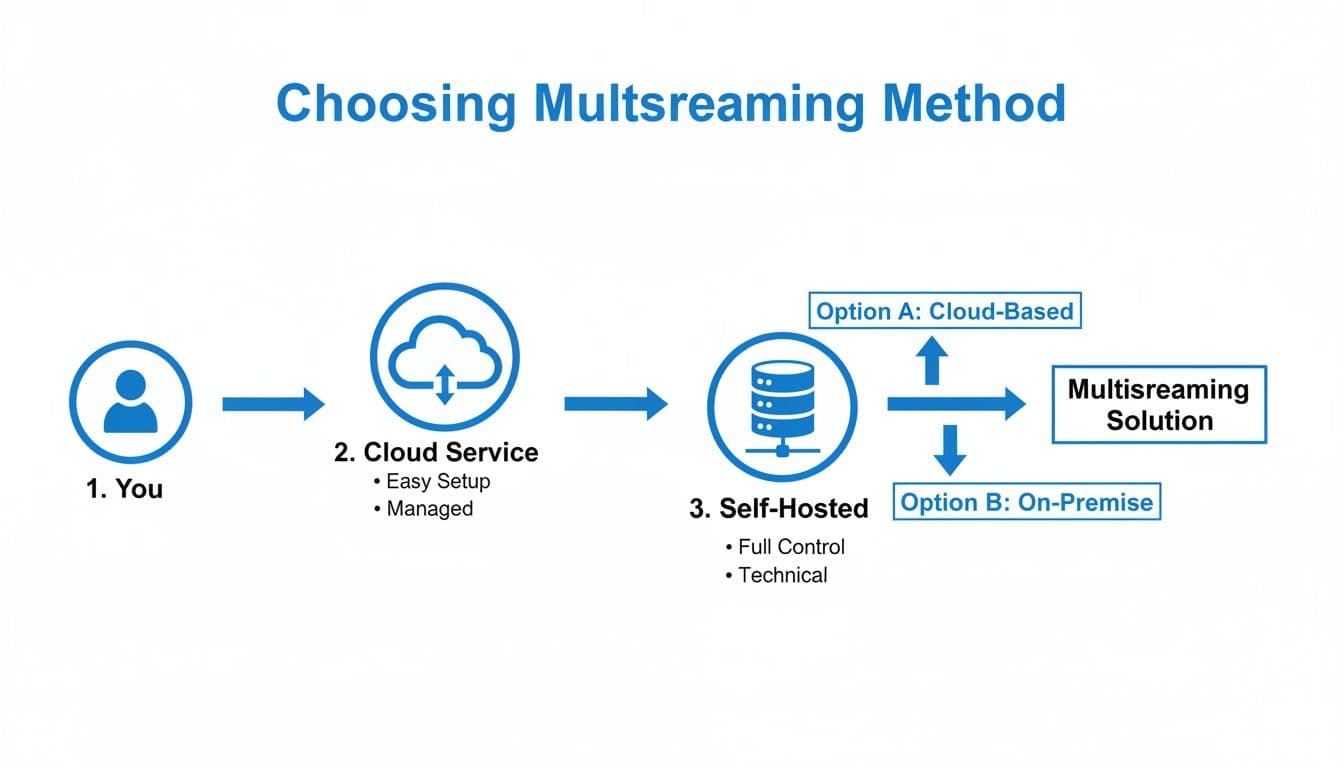
As you can see, it boils down to two core choices: the simplified route through a cloud service or the more hands-on, self-hosted option.
Configuring for a Third-Party Service
If you decided to go with a service like Restream, your setup is refreshingly simple. Your only job is to send a single, high-quality stream from your software to their servers. They do all the heavy lifting from there.
It's a quick three-step process:
- Find Your Unique RTMP Details: Log into your multistreaming service's dashboard. You'll find a specific RTMP server URL and a stream key just for your account.
- Plug Them Into Your Software: In OBS or Streamlabs, head over to
Settings > Stream. In the "Service" dropdown, you'll want to select "Custom..." - Paste and Go Live: Copy the server URL and stream key from the service's dashboard and paste them into the matching fields in your software. Click "Apply," and you're set.
That’s pretty much it. When you hit "Start Streaming," your software sends your feed directly to the service's cloud. You'll then manage which platforms go live from the service's website, not from inside OBS.
The big win with service-based multistreaming is simplicity. Your streaming software only has to worry about one connection, which drastically reduces the strain on your PC and internet.
This approach keeps your local setup clean and reliable. You're only focused on the quality of one outgoing stream, which makes troubleshooting a whole lot easier if things go sideways.
Dialing In Your Output Settings
Regardless of your method, your stream's stability hangs entirely on your output settings—and bitrate is king. When setting up your streaming software for multistreaming, a critical factor to consider for optimal performance and quality is understanding what constitutes a good upload speed, as this directly impacts your stream's stability.
Your bitrate is simply the amount of data you're sending every second. More data equals better quality, but it also demands more from your internet connection. If you set it too high, your viewers will be stuck watching a buffering wheel.
- Resolution and Frame Rate: First, decide on your target quality. For most gaming and live content, 1080p at 60 frames per second (fps) is the gold standard. If you're doing something less action-packed, like a podcast, 1080p at 30 fps is more than enough.
- Choosing a Bitrate: A solid rule of thumb is to never let your video bitrate exceed about 75-80% of your total available upload speed. This leaves a crucial buffer for game data, Discord, and anything else running on your network.
For a stable 1080p60 stream, a video bitrate around 6,000 kbps is a great starting point, but that means you'll need a consistent upload speed of at least 8-10 Mbps.
Here is a quick reference for matching your bitrate to your resolution to keep your stream smooth.
Recommended Bitrate Settings for Multistreaming
| Resolution & FPS | Recommended Video Bitrate (kbps) | Required Upload Speed (Mbps) |
|---|---|---|
| 1080p @ 60 fps | 6,000 - 8,000 | 10 - 12 |
| 1080p @ 30 fps | 4,500 - 6,000 | 8 - 10 |
| 720p @ 60 fps | 4,500 - 6,000 | 8 - 10 |
| 720p @ 30 fps | 3,000 - 4,500 | 6 - 8 |
These numbers provide a safe buffer, ensuring that even with network fluctuations, your stream remains stable for your viewers.
Configuring for a Self-Hosted Setup
If you're taking the self-hosted path, get ready to get your hands a little dirtier. Your software now has to juggle connections to multiple destinations simultaneously. The base version of OBS Studio can only send one stream out, so you'll need a specialized plugin to make this work.
The go-to tool for this is the Multiple RTMP outputs plugin. Once you install it, a new dock will appear in your OBS interface where you can add all your different streaming targets.
For each platform you want to add (Twitch, YouTube, Kick, etc.), you'll do the following:
- Grab the Stream Key: Head to each platform's creator dashboard and find its unique RTMP server URL and stream key.
- Add a New Target: In the OBS plugin's panel, just click "Add new target."
- Enter the Platform Details: Give the target a name (like "YouTube Stream"), paste in the RTMP server URL and stream key, and if you need to, you can even configure separate video and audio settings for that specific output.
You have to repeat this for every single platform you plan to broadcast to. When you start your main stream in OBS, you then have to manually start each additional output from the plugin's panel. This method gives you ultimate control, but it also multiplies the stress on your computer's hardware and your internet connection.
Keeping Up with Chat and Community Across Every Platform
Going live everywhere is one thing, but actually managing the conversations that pop up is a completely different beast. When you stream to multiple platforms, you're no longer broadcasting to a single room; your audience is spread out across several digital venues. It can get overwhelming fast, turning a fun, interactive stream into a mad dash to keep up with every chat window.
The real trick is to pull all those separate conversations into one place. You never want your YouTube viewers to feel left out while you’re chatting with Twitch, or your Facebook audience to think they’re being ignored. Failing to engage with everyone makes the whole broadcast feel disjointed and can push away the very audience you worked so hard to attract.
Unifying Your Chat Experience
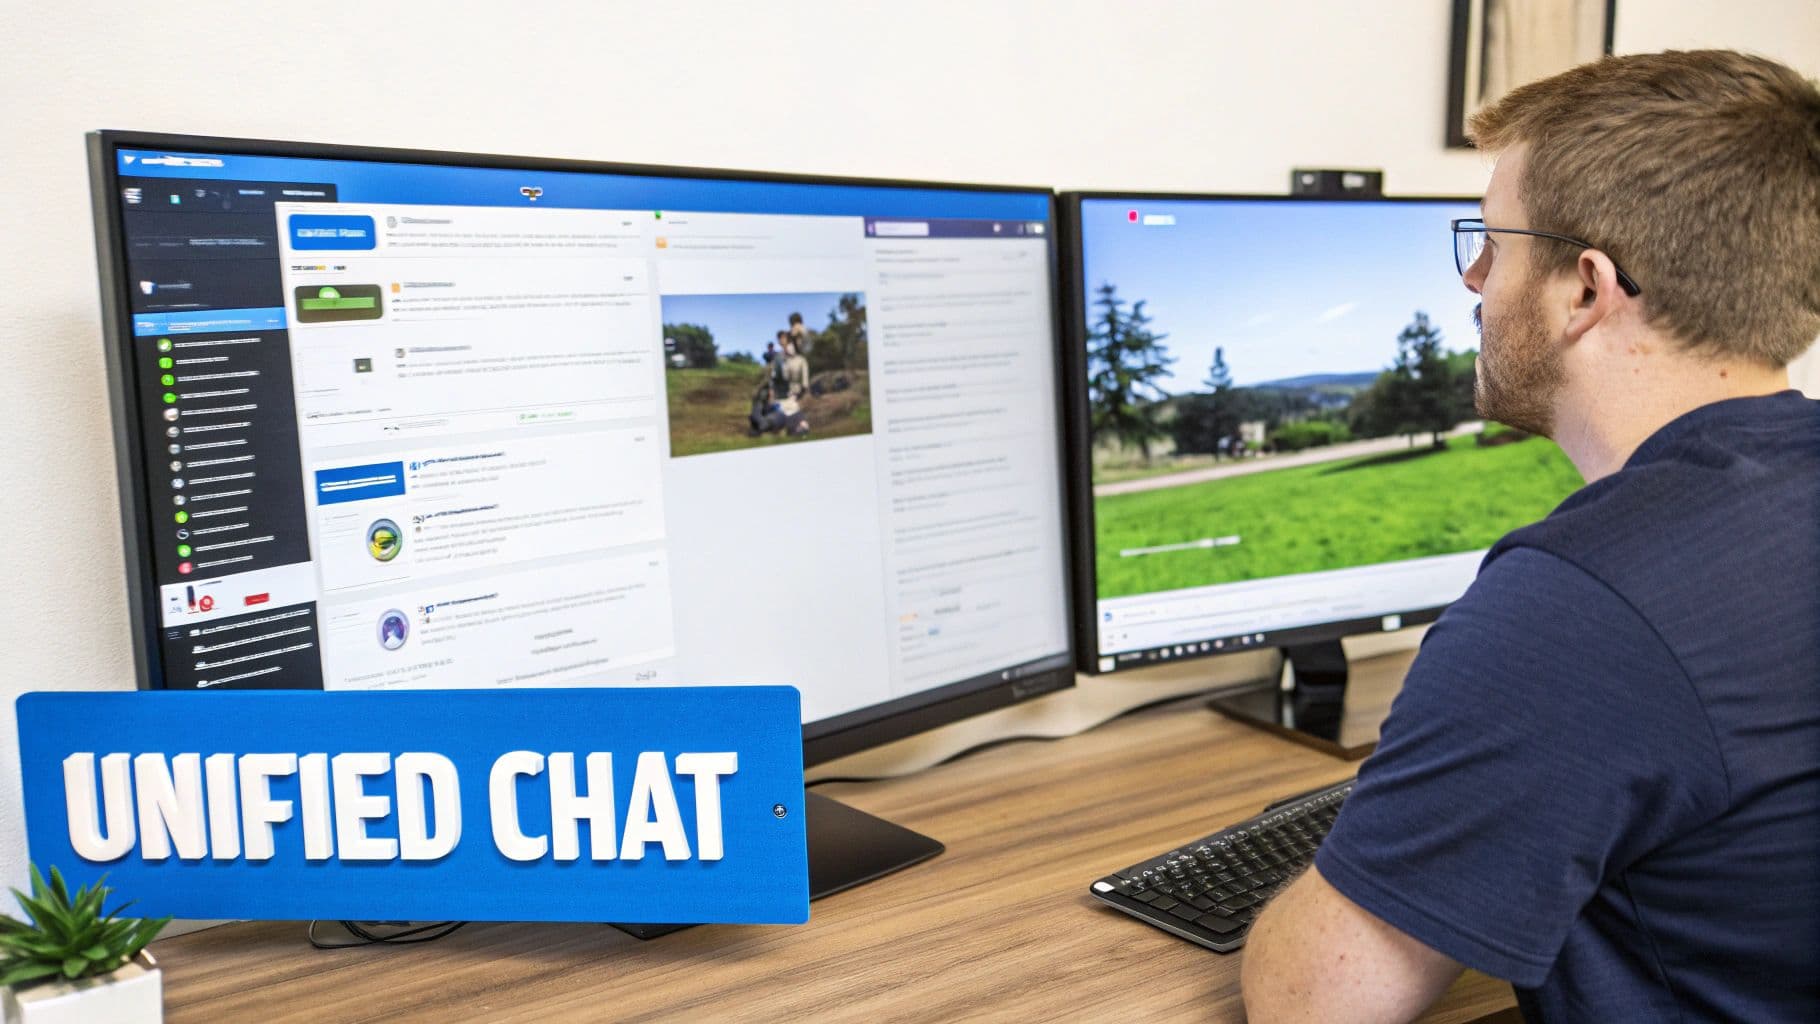
The most straightforward fix is to use a tool that merges all your chat feeds into a single, easy-to-read window. Most of the big multistreaming services like Restream have this built-in, but you can also find standalone tools and OBS plugins that do the job just as well.
You can display this combined feed right in your streaming software or pop it out onto a second monitor. Instead of frantically clicking between browser tabs, you'll see every message from Twitch, YouTube, and Facebook in one timeline, usually with a little icon showing where it came from.
This simple change brings a few huge wins:
- You won't miss a thing: You can see and react to questions and comments from every platform as they happen.
- It’s less draining: You’re not constantly switching contexts, which frees up mental energy to focus on your content and the conversation itself.
- It creates a unified vibe: When viewers see you responding to people from other platforms, it reinforces the feeling that everyone is part of the same big event.
Pulling all your chats into one feed transforms a bunch of separate audiences into a single, connected community. It’s a small technical tweak that makes a massive difference in how professional and engaging your stream feels.
Fostering a True Community Hub
A unified chat is a great tactical move, but building a real community requires more than just reading messages. You need a central hub—a place where your viewers can connect with you and each other, even when you're not live.
The best way I’ve seen this done is by creating a dedicated, platform-neutral space. For most creators, that means starting a Discord server. Point everyone—from Twitch, YouTube, Kick, everywhere—to join your Discord for announcements, behind-the-scenes content, and off-stream chats.
This strategy is powerful because it gives your scattered audience a shared home and identity. To really drive it home, make a point of encouraging cross-platform interaction during your stream. Give shout-outs that mention the platform, like "Thanks for that question, Sarah from YouTube!" or "Mike over on Twitch, that’s a great point!" It makes everyone feel seen.
Staying present is key. To keep a community thriving, you have to show up. A Socialinsider report on social media benchmarks found that brands post an average of 5 times per week on both Instagram and TikTok. Add in your other platforms, and you're looking at a serious commitment to keep everyone engaged. You can check out more stats in the full social media benchmarks report to get a sense of the landscape.
Don't Forget Monetization and Alerts
Finally, let's talk about the money. Tips, subs, Super Chats, and other monetization alerts come from all over the place. A unified system here is just as important as it is for chat. Most modern alert services can plug into multiple platforms at once, funneling all your support notifications into one queue.
This ensures you never miss a chance to thank someone for their support, no matter where it came from. Acknowledging a donation in real-time is one of the best ways to build loyalty and encourage others to contribute. For a deeper look at building that loyalty, our guide on community building strategies is a great resource.
By centralizing both your chat and your alerts, you create a seamless, professional broadcast where every single viewer feels like a valued part of the show.
Troubleshooting Common Multistreaming Problems
Let's be real: even the most seasoned streamers run into technical glitches. It’s just part of the game. When you’re multistreaming, you’re adding more layers of complexity, which means more potential points of failure. But don't worry, most issues can be sorted out quickly if you know where to look.
Instead of panicked clicking, we'll walk through a methodical process to figure out what's going wrong. Nearly every multistreaming problem boils down to one of three things: your local setup (PC and encoder), your internet connection, or the streaming platforms themselves. The trick is to isolate the culprit.
Is Your PC the Bottleneck?
More often than not, the source of a choppy, lagging stream is sitting right on your desk. If you’re seeing dropped frames, your streaming PC is probably struggling to keep up.
Think about it: your computer's CPU is performing the monumental task of encoding your video live. When it gets overwhelmed, it starts skipping frames to stay on schedule, which looks terrible to your viewers.
Here's how to check if your system is overloaded:
- Watch Your CPU Usage: Before and during your stream, pop open your Task Manager (Windows) or Activity Monitor (Mac). If your streaming software like OBS or Streamlabs is hogging 80-90% or more of your CPU, you've found your problem.
- Ease Up on the Encoder Preset: Dive into your streaming software's output settings. The encoder preset tells your CPU how hard to work. Shifting from a "Quality" preset to "Performance" or even "High Performance" can make a world of difference, often with a barely noticeable drop in visual fidelity.
- Lower In-Game Graphics: If you're a game streamer, this one is huge. Dialing back demanding graphics settings like shadows or anti-aliasing frees up a ton of resources that your encoder can use instead.
Sorting Out Network and Connection Woes
Your internet connection is the pipeline carrying your stream to the world. An unstable or insufficient upload speed is a classic dream-killer, causing constant buffering and sudden disconnects for your audience. First rule of streaming: if you can plug in with an Ethernet cable, do it. It’s always more stable than Wi-Fi.
Still having trouble? It might be time to look a little deeper.
An unstable stream is often a network problem in disguise. Prioritize a stable, wired connection and ensure your upload speed has at least a 25% buffer over your total bitrate to handle network fluctuations without dropping frames.
Most modern routers have a Quality of Service (QoS) feature. Find this in your router's settings and give your streaming computer top priority. This tells your router to feed your stream the bandwidth it needs first, even if someone else on your network decides to start downloading a massive file.
Dealing with Platform-Specific Errors
What happens when your stream is running smoothly to Twitch, but YouTube just won't connect? This almost always points to an issue with that specific platform's configuration.
The most common culprit here is an invalid stream key. Platforms sometimes reset these keys for security, or maybe you just copied it wrong. Always double-check that you're using the current, correct key from your platform's dashboard.
If you're using a multistreaming service, you might also run into API connection failures. This is just a fancy way of saying the service is having trouble talking to the platform (like Facebook or YouTube). The fix is usually surprisingly simple: just disconnect that platform's account from your multistreaming dashboard and reconnect it. This forces a refresh of the authentication and often solves the problem instantly.
Diving Into Multistreaming: Your Questions Answered
Jumping into multistreaming can feel a little overwhelming at first. You've got questions, and that's a good thing—it means you're thinking strategically. Let's tackle some of the most common ones that come up when creators decide to stream to multiple platforms.
Can I Really Stream to Twitch and YouTube at the Same Time?
You sure can. In fact, it's one of the most common and powerful duos out there. Whether you use a dedicated multistreaming service or a local multi-RTMP plugin, you can send your live feed to both platforms and tap into two unique communities at once.
There's a big "but" here, though, and it's about platform rules. If you're a Twitch Affiliate, you're bound by their 24-hour exclusivity clause. This means you technically can't stream that same live content on YouTube, Kick, or anywhere else simultaneously. Always, always double-check the latest terms of service for every platform you're broadcasting to. They change more often than you'd think.
Is Multistreaming Going to Tank My Stream Quality?
It absolutely doesn't have to. How multistreaming affects your quality boils down to your method and, most importantly, your internet upload speed.
- Using a Cloud Service: This is the magic bullet for most streamers. You send just one high-quality stream from your computer to the service's cloud servers. They do all the heavy lifting of duplicating and sending it out to Twitch, YouTube, etc. This puts almost no extra strain on your PC or your internet connection.
- Going the DIY Route: If you're running everything from your own PC (like with the OBS multi-RTMP plugin), your computer and internet connection have to push out a separate stream for each platform. This can be a huge resource hog and can definitely impact your quality if your setup isn't beefy enough.
The real secret is matching your multistreaming method to your hardware and internet capabilities. For 99% of creators, a cloud service is the safest way to guarantee a crisp, stable stream for your viewers without needing a monster PC and fiber-optic internet.
Should I Use a Service or Just Do It Myself?
For the vast majority of creators, signing up for a dedicated multistreaming service is the way to go. It completely removes the technical headache, frees up your internet bandwidth, and usually comes with killer features like a combined chat that pulls messages from all your platforms into one window. It lets you be a creator, not a network engineer.
The self-hosted, DIY path is really for the tech-savvy streamers who crave total control and want to sidestep monthly fees. It gives you incredible flexibility but demands a lot more from your hardware and your technical know-how. To get a better handle on the core idea, check out our guide that breaks down what crossposting is and why it's so effective.
Ready to automate the rest of your content workflow? While you focus on your live broadcast, let PostOnce handle sharing your highlights, announcements, and updates across all your social channels. Sign up today and put your social media on autopilot.